Step 1
Open Gmail settings
Open Gmail on desktop, click the Settings gear, then choose See all settings.

Gmail forwarding
Complete these four steps before generating filters.
Step 1
Open Gmail on desktop, click the Settings gear, then choose See all settings.
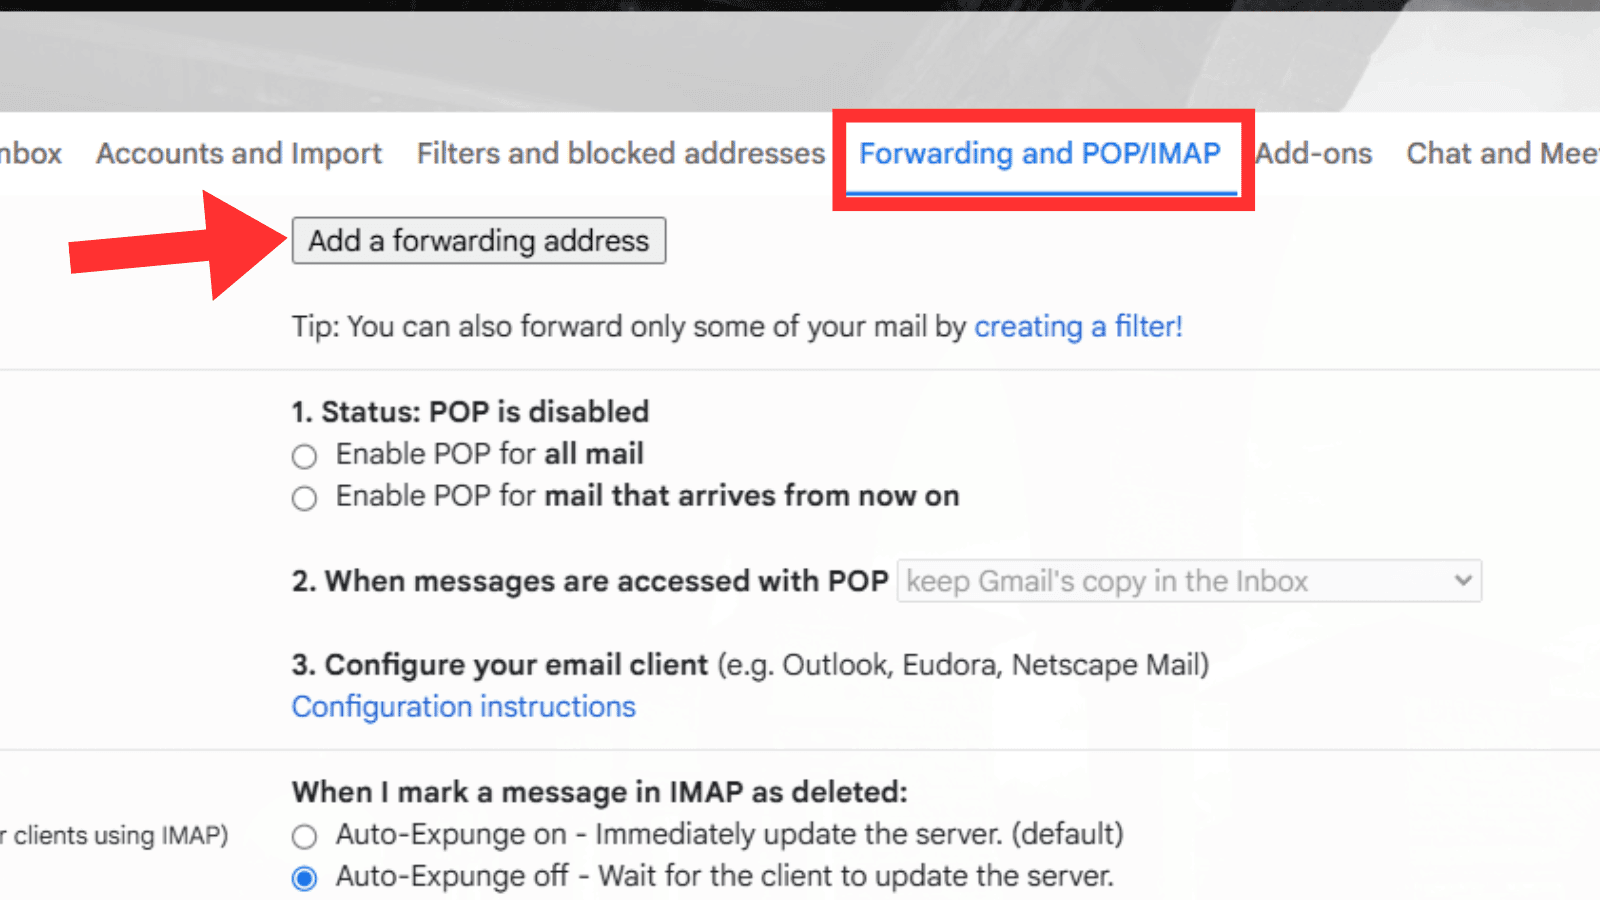
Step 2
Go to Forwarding and POP/IMAP, then click Add a forwarding address.
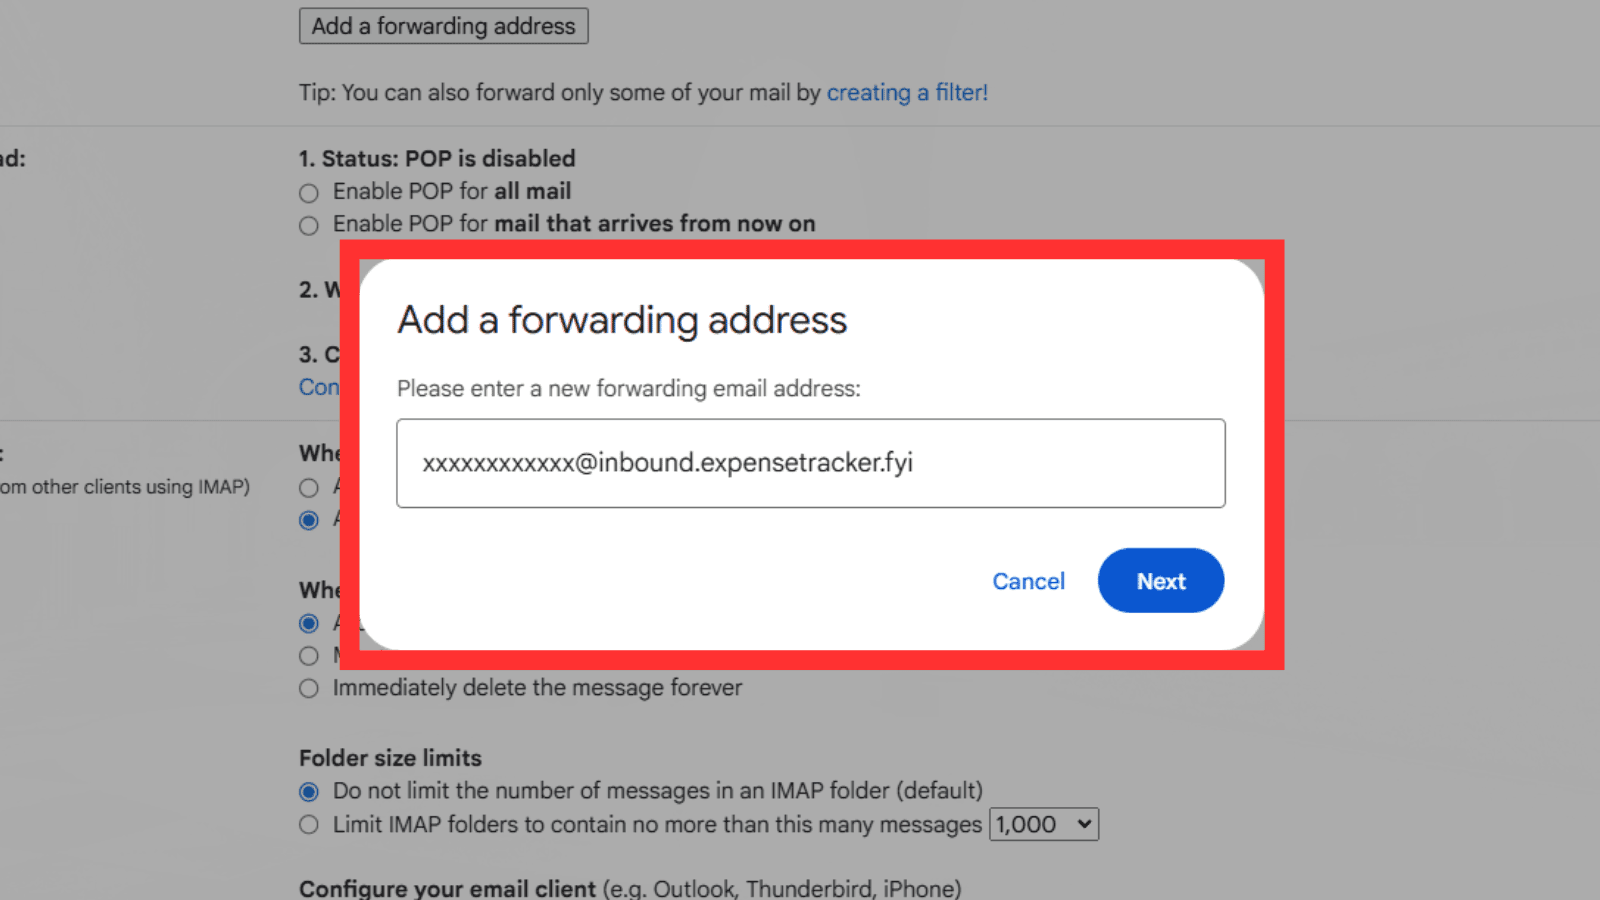
Step 3
Paste the forwarding email generated by the Telegram bot, then confirm and proceed.
Step 4
The Telegram bot will send you the verification message. Click the approval link to verify the forwarding address.

Step 5
Select the banks you want to include, then download an XML file with the Gmail filters pre-configured.
Use the forwarding alias generated by the Telegram bot.
What the filter will do
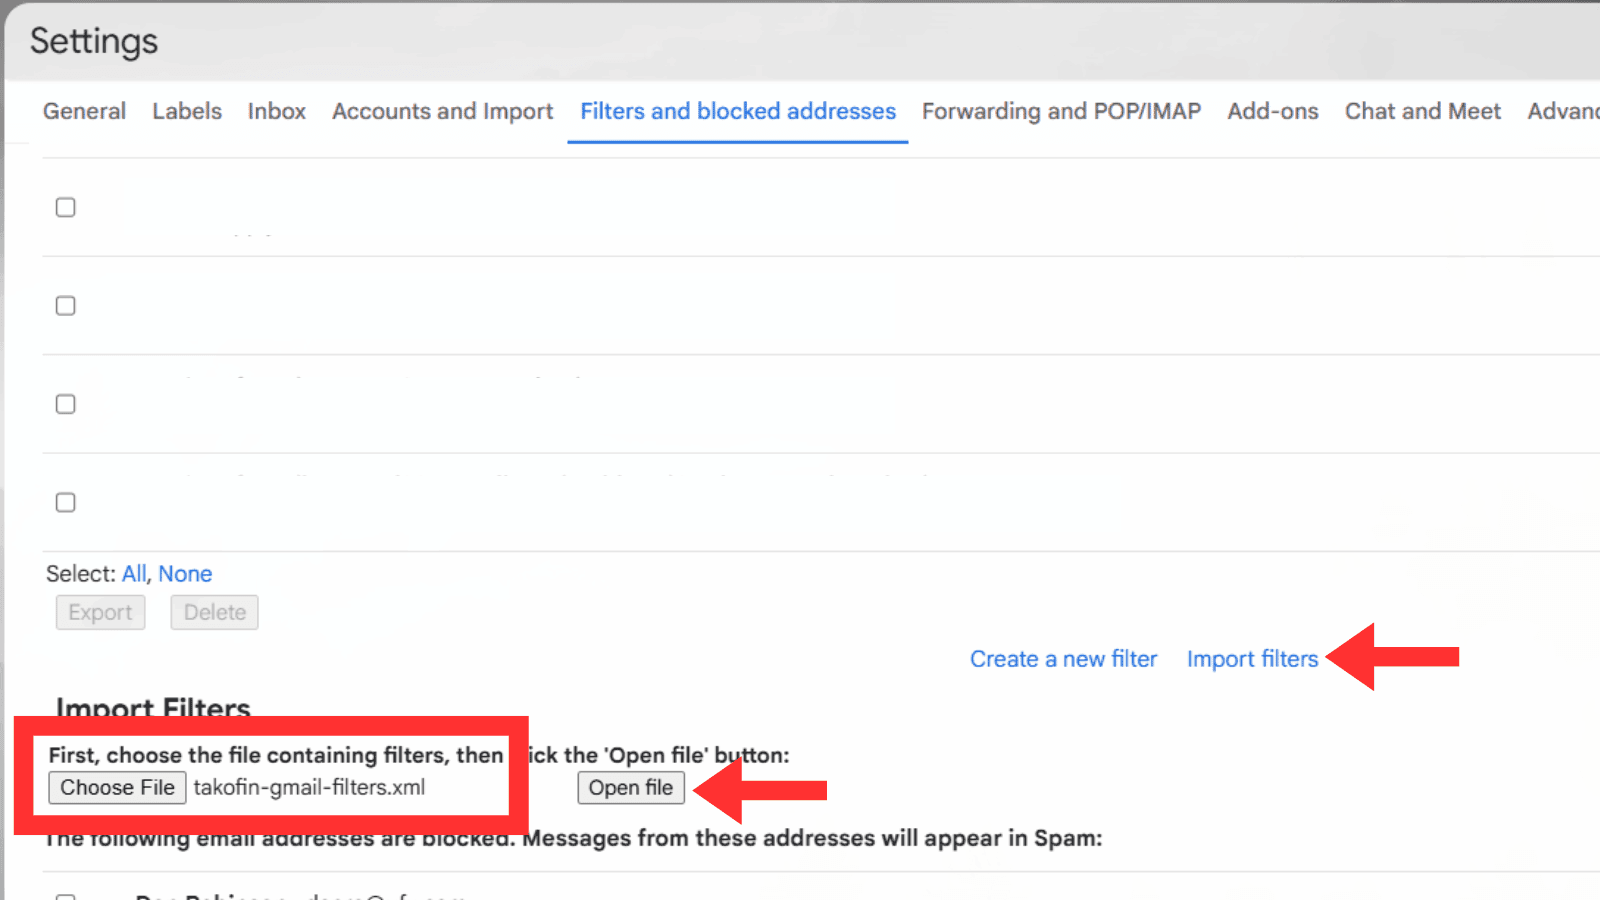
Step 6
Go to Gmail Settings > Filters and Blocked Addresses > Import filters, upload the XML file you downloaded, and click on Open file.
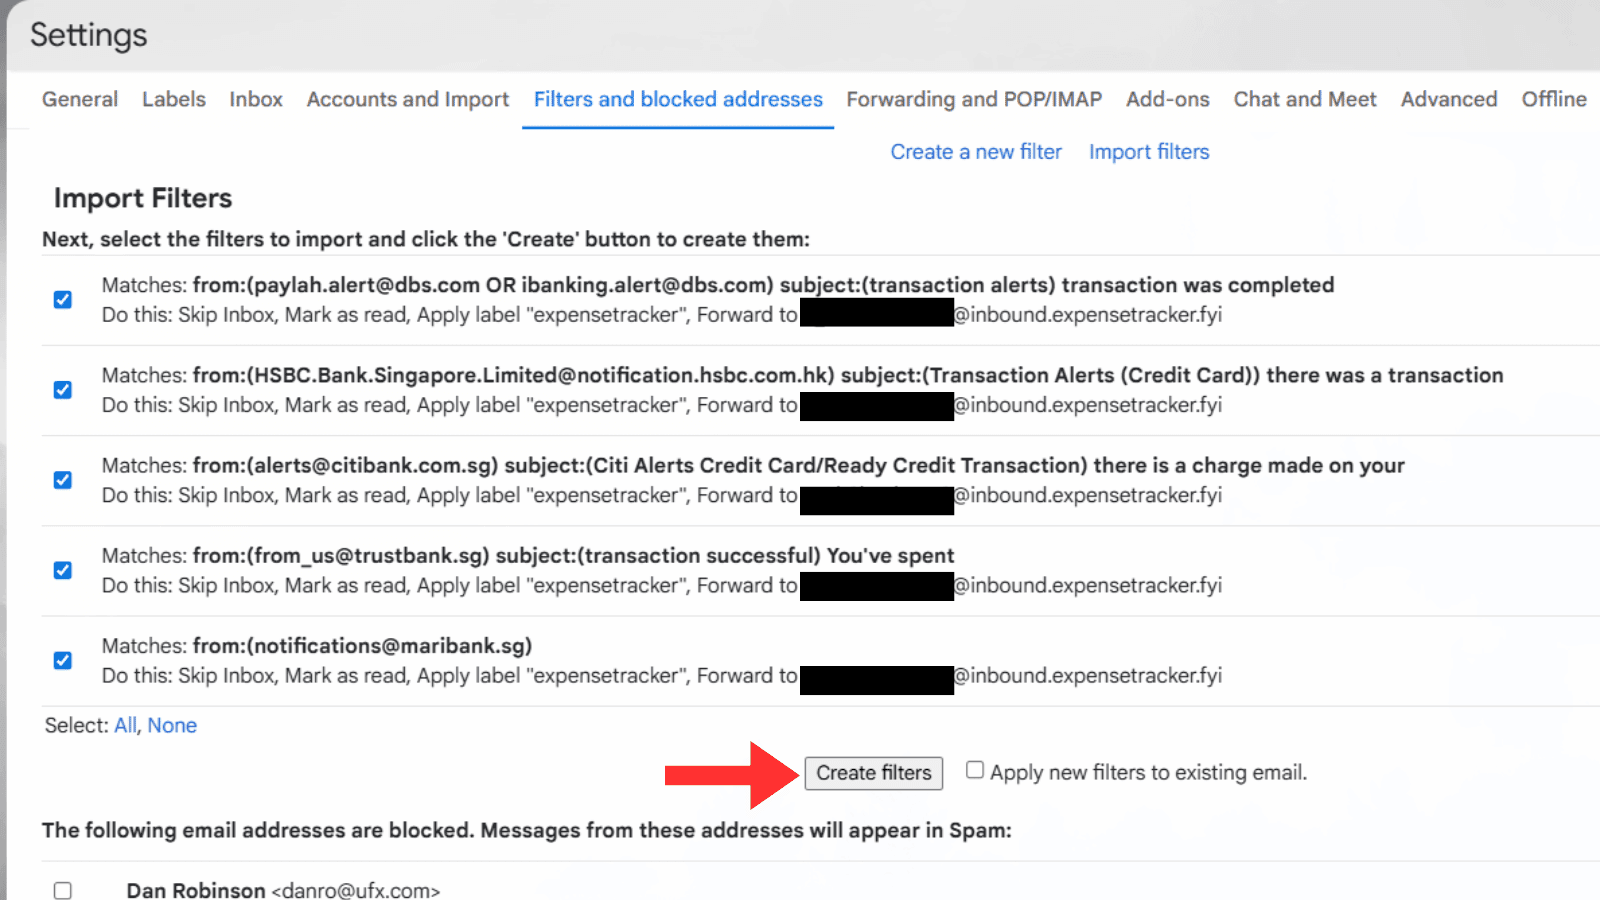
Step 7
Make sure the filters are configured to forward only the relevant transaction-alert emails, apply the expensetracker label, skip the inbox, and mark as read. Then proceed to create the filters.
Step 8
Gmail will now automatically forward the relevant transaction-alert emails to TakoFin. Every forwarded transaction will be logged into your TakoFin tracker automatically, so you save time on manual expense entry.